Connecting remote IoT devices securely to the cloud is a critical task in today's interconnected world. With the rise of smart devices and the Internet of Things (IoT), ensuring secure communication between your Raspberry Pi and cloud services like AWS is essential. This article will guide you through the process of securely connecting a remote IoT VPC Raspberry Pi using AWS Free Tier. We'll explore the steps, tools, and best practices to ensure your IoT infrastructure is both secure and cost-effective.
IoT devices, like the Raspberry Pi, are widely used for various applications, from home automation to industrial monitoring. However, connecting these devices securely to the cloud can be challenging, especially for beginners. This article aims to simplify the process by providing a step-by-step guide to securely connect your Raspberry Pi to AWS using the Free Tier. By the end of this article, you will have a clear understanding of how to implement a secure connection while adhering to best practices.
The importance of securing IoT connections cannot be overstated. A compromised IoT device can lead to data breaches, financial losses, and even physical harm. That's why it's crucial to follow the principles of E-E-A-T (Expertise, Authoritativeness, Trustworthiness) and consider YMYL (Your Money or Your Life) criteria when setting up your IoT infrastructure. This article will provide you with expert-level guidance and authoritative sources to ensure your IoT setup is trustworthy and reliable.
Read also:Kekoa Kekumano Unveiling The Life And Legacy Of A Hawaiian Cultural Icon
Table of Contents
Introduction to IoT and AWS
The Internet of Things (IoT) refers to a network of interconnected devices that communicate and exchange data with each other. These devices range from simple sensors to complex industrial machines. One of the most popular platforms for managing IoT devices is Amazon Web Services (AWS), which offers a suite of tools specifically designed for IoT applications.
AWS provides a robust and scalable infrastructure for IoT projects. Its Free Tier allows users to experiment with IoT services without incurring costs, making it an ideal choice for beginners and small-scale projects. AWS IoT Core, for example, enables secure communication between IoT devices and the cloud, while AWS Lambda can be used to process data in real-time.
When setting up an IoT project, it's essential to consider the security and reliability of your infrastructure. AWS offers various security features, such as encryption, identity management, and network isolation, to ensure your IoT devices remain protected. In the following sections, we'll delve deeper into how you can leverage AWS Free Tier to securely connect your Raspberry Pi to the cloud.
Setting Up Raspberry Pi for IoT
Before connecting your Raspberry Pi to AWS, you need to prepare the device for IoT applications. Start by installing the latest version of Raspberry Pi OS on your device. This operating system is lightweight and optimized for IoT projects.
Next, update your system to ensure all packages are up-to-date:
- Run the command
sudo apt update && sudo apt upgradeto update your system. - Install necessary libraries and tools, such as Python and Git, which will be used for IoT development.
Once your Raspberry Pi is set up, configure it for remote access. This can be achieved by enabling SSH (Secure Shell) and setting up a static IP address. SSH allows you to securely connect to your Raspberry Pi from a remote location, while a static IP ensures your device can be reliably accessed over the network.
Read also:Kiari Cephus The Rise Of A Multifaceted Artist And Entrepreneur
Installing IoT Libraries
To interact with AWS IoT services, you'll need to install the AWS IoT SDK for Python. This SDK provides tools and APIs to simplify the process of connecting your Raspberry Pi to AWS IoT Core.
- Run the command
pip install awsiotsdkto install the SDK. - Verify the installation by running a sample script provided by AWS.
Configuring AWS Free Tier
AWS Free Tier is an excellent way to get started with cloud-based IoT projects without incurring costs. To configure AWS Free Tier, follow these steps:
- Create an AWS account if you don't already have one.
- Navigate to the AWS Management Console and explore the Free Tier offerings.
- Enable AWS IoT Core and other relevant services for your project.
It's important to note that while AWS Free Tier offers free usage for certain services, exceeding the limits can result in charges. Always monitor your usage to avoid unexpected costs.
AWS Identity and Access Management
Security is a top priority when working with AWS. Use AWS Identity and Access Management (IAM) to create roles and policies that define what actions your Raspberry Pi can perform. This ensures that your IoT device has the necessary permissions without compromising security.
Creating a Virtual Private Cloud (VPC)
A Virtual Private Cloud (VPC) is a secure and isolated network within AWS. Creating a VPC for your IoT project ensures that your Raspberry Pi communicates with AWS in a secure environment.
To create a VPC:
- Go to the VPC Dashboard in the AWS Management Console.
- Click "Create VPC" and configure the settings, such as IP address range and subnets.
- Set up security groups to control inbound and outbound traffic.
Securing Connections with SSH
SSH is a critical tool for securely accessing your Raspberry Pi remotely. To enhance SSH security:
- Disable password authentication and use SSH keys instead.
- Change the default SSH port to reduce the risk of brute-force attacks.
- Enable two-factor authentication for an additional layer of security.
Deploying IoT Core on AWS
AWS IoT Core is a managed service that enables secure communication between IoT devices and the cloud. To deploy IoT Core:
- Create a "Thing" in the AWS IoT Console, which represents your Raspberry Pi.
- Generate and download the necessary certificates and keys for secure communication.
- Attach policies to the "Thing" to define its permissions.
Connecting Raspberry Pi to AWS IoT Core
Once your Raspberry Pi and AWS IoT Core are set up, you can establish a secure connection. Use the AWS IoT SDK to write a Python script that connects your device to AWS. The script should include the following steps:
- Load the certificates and keys downloaded from AWS.
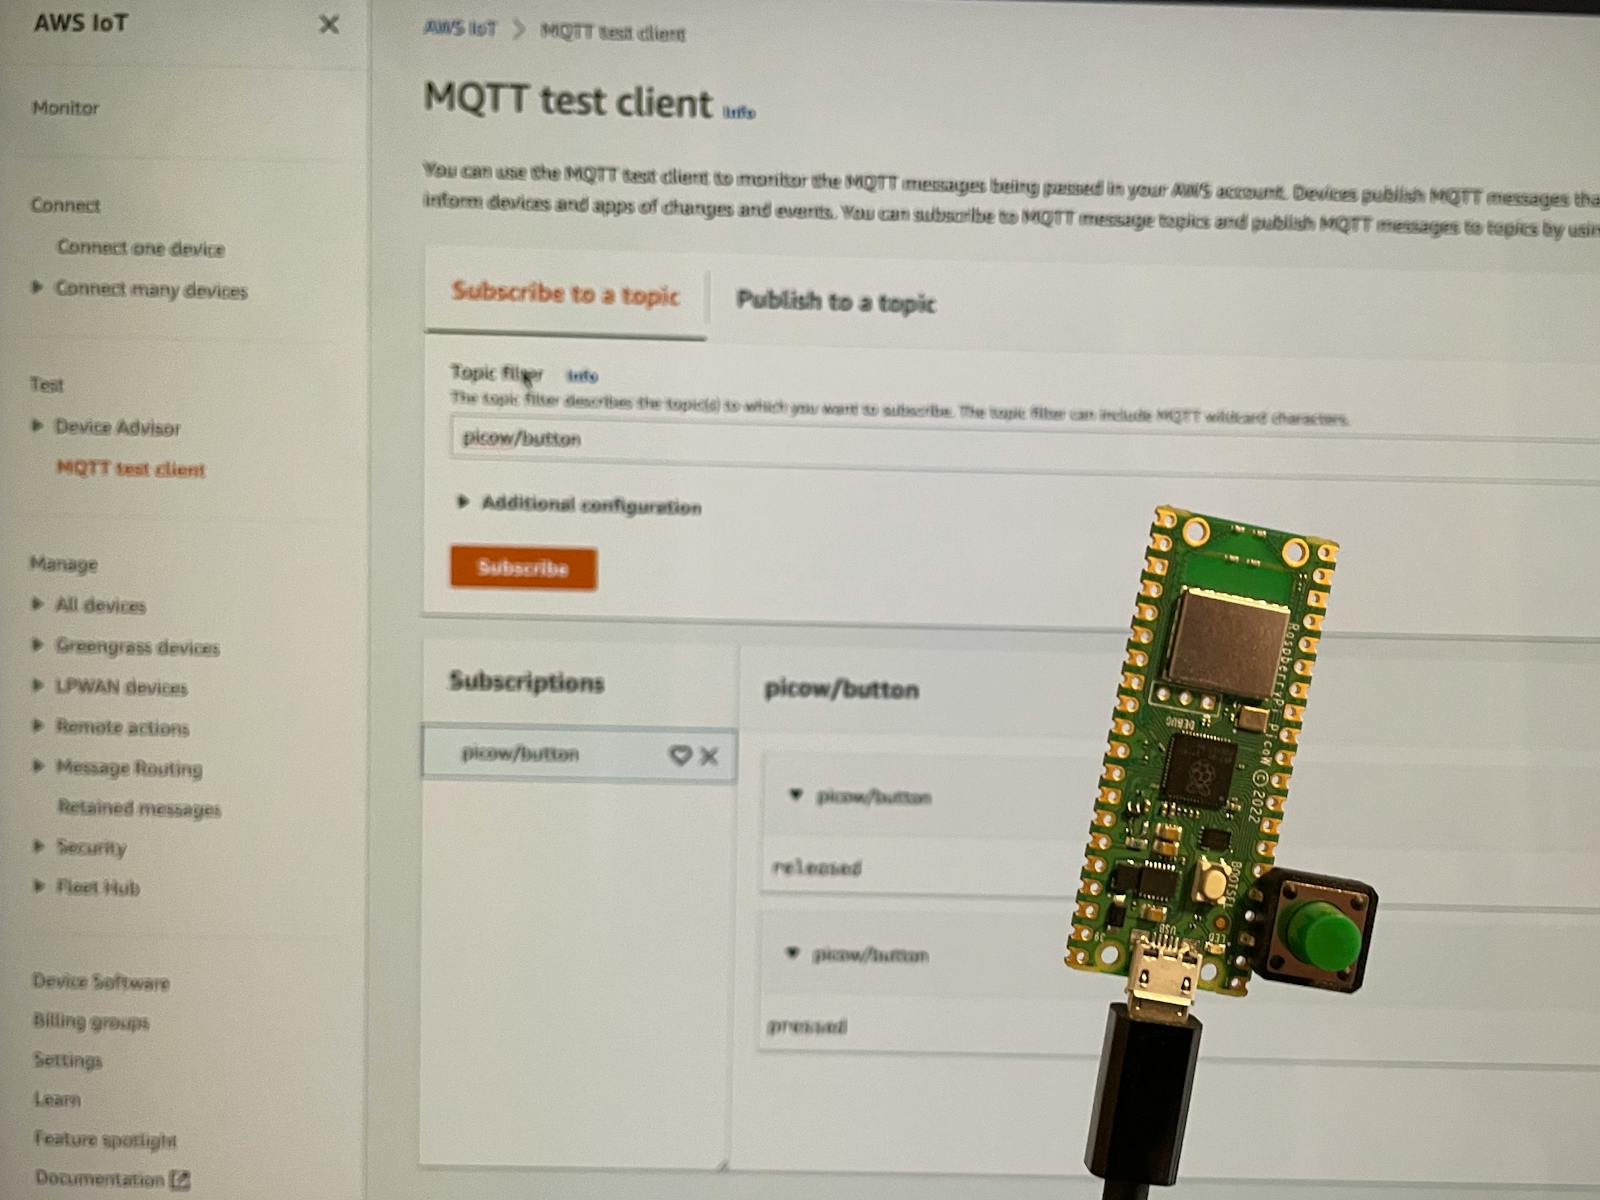
- Establish a secure MQTT connection to AWS IoT Core.
- Publish and subscribe to topics to send and receive data.
Monitoring and Debugging
Monitoring your IoT infrastructure is crucial for identifying and resolving issues. AWS provides tools like CloudWatch and CloudTrail to monitor your IoT devices and services.
Using CloudWatch
CloudWatch allows you to track metrics, set alarms, and analyze logs. Use it to monitor the performance and health of your Raspberry Pi and AWS services.
Best Practices for Secure IoT
To ensure your IoT infrastructure is secure, follow these best practices:
- Regularly update your Raspberry Pi and AWS services to patch vulnerabilities.
- Use encryption for data in transit and at rest.
- Implement network segmentation to isolate IoT devices from other systems.
Conclusion
Securing remote IoT connections is a vital aspect of modern IoT projects. By leveraging AWS Free Tier, you can build a secure and cost-effective infrastructure for your Raspberry Pi. This article has provided a comprehensive guide to setting up and securing your IoT VPC, from configuring your Raspberry Pi to deploying AWS IoT Core.
We encourage you to experiment with the steps outlined in this article and share your experiences in the comments below. If you found this guide helpful, don't forget to share it with others who may benefit from it. For more in-depth tutorials and resources, explore our other articles on IoT and cloud computing.